We all know how important it is to have a social media presence. It’s one of the best ways to connect with your community and bring awareness to your cause. As effective as short-form video content is, and for as simple as it seems, creating videos can be a huge pain. You may not even know how to make a composite video.
Whether you’re short on time or just don’t know where to start, MemoryFox has got you covered. Here is how to make a composite video in Canva – a step-by-step guide to simplify your media marketing with a video that’s impossible to scroll past!
It may be helpful to follow along with Canva open in another tab so you can practice as we go, or check out the example video at the bottom of the page.
Step 1: Create
From the home page, click the “+ create” button and choose the type of media you are looking for. Canva has templates for a variety of social media platforms, including: Instagram Reels, TikTok, YouTube Shorts, or general videos.
FOX TIP: Did you know that all Canva projects can be downloaded and posted on any site? This means that choosing a TikTok template to start your project doesn’t mean you need to start over for your Instagram Reel – it can be easily used there, too!
Once you pick your video form, you can either start on a blank page and take full control of the creative process, or you can select a suggested video style design to help you get started. If you’re using a Canva template, you may simply replace the existing videos and photos with your own content.
FOX TIP: If you’re brand new to using Canva, I recommend you check out MemoryFox’s Short-Form Video Canva Templates. Not only are these exceptionally simple Canva templates to use, but they all have a specific nonprofit-focus.
Step 2: Uploading Content
There are a few ways to upload your photos and videos to Canva. You could:
- Upload files directly from your desktop using “uploads” on the left sidebar. You can drag and drop files from your desktop directly into Canva, then use the features to crop and edit photos.

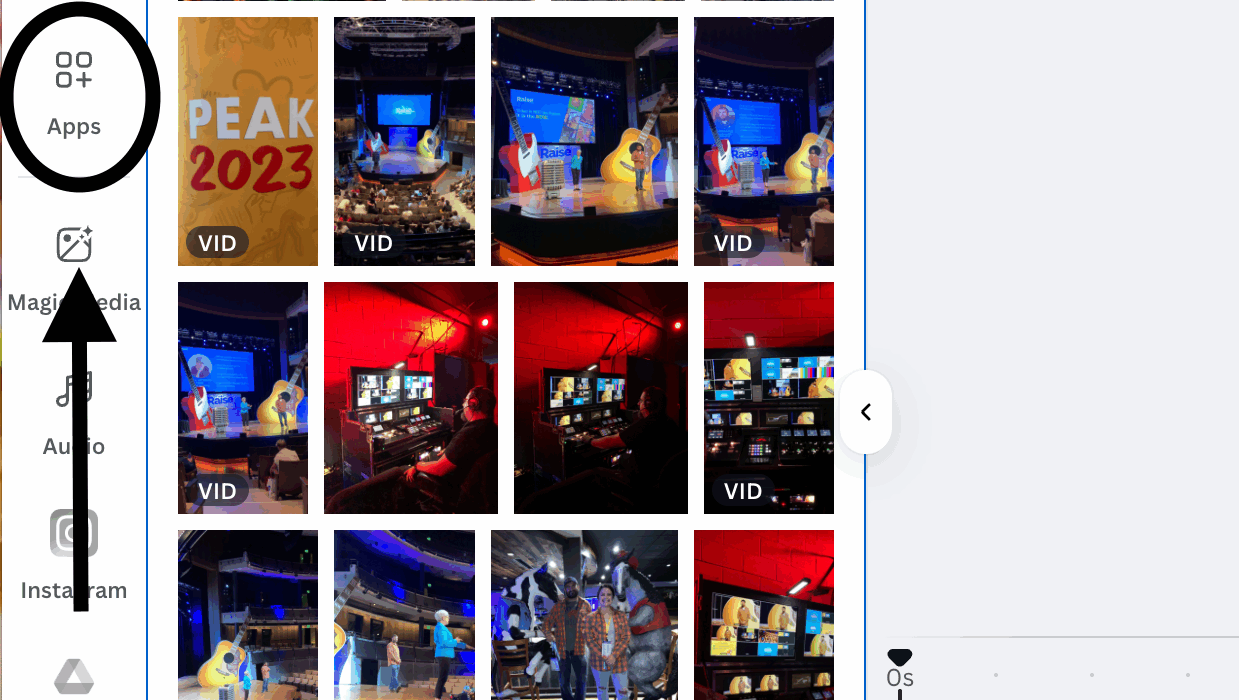
2. Connect story collection apps like MemoryFox by clicking “apps” and using the search bar, or you can integrate your content from Google Drive or social media accounts by clicking “uploads” on the left sidebar.
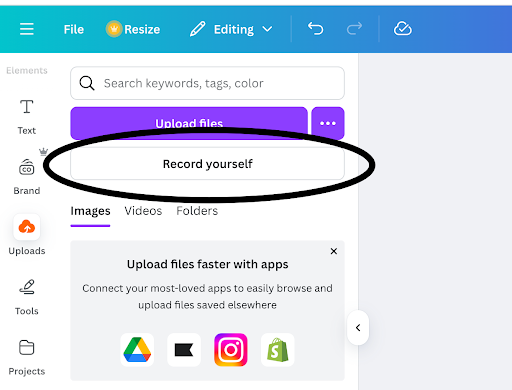
- Record yourself, your voice, or create an AI recording directly through Canva by clicking “uploads” then “record yourself”.
Step 3: Edit
Canva has many editing tools that can seem overwhelming if you aren’t familiar or don’t have the attention span to make an Oscar-worthy short film. Today, I’ve broken down a few common tools to help you utilize lots of content at once.
Each piece of content will be its own page. Click the “+” (plus) button to add a new page, then click and drag pages to adjust the order. Whether it’s a photo or video, you can adjust the length of time or section of the video you want to show by dragging the edges of the page left or right.

You can then add transitions between pages by selecting the page, then clicking the three dots at the top right. Those dots will be your best friend as they will show you all the common features used to edit pages.
One of my favorite features is “split page”. By splitting the page, you can add a video on top of the video you already have. It’s important to note that the page will always split at the point where the vertical line crosses over it. To adjust the placement of the line, you can drag it around from the triangle arrow above it, or play your video and pause where you want to split.

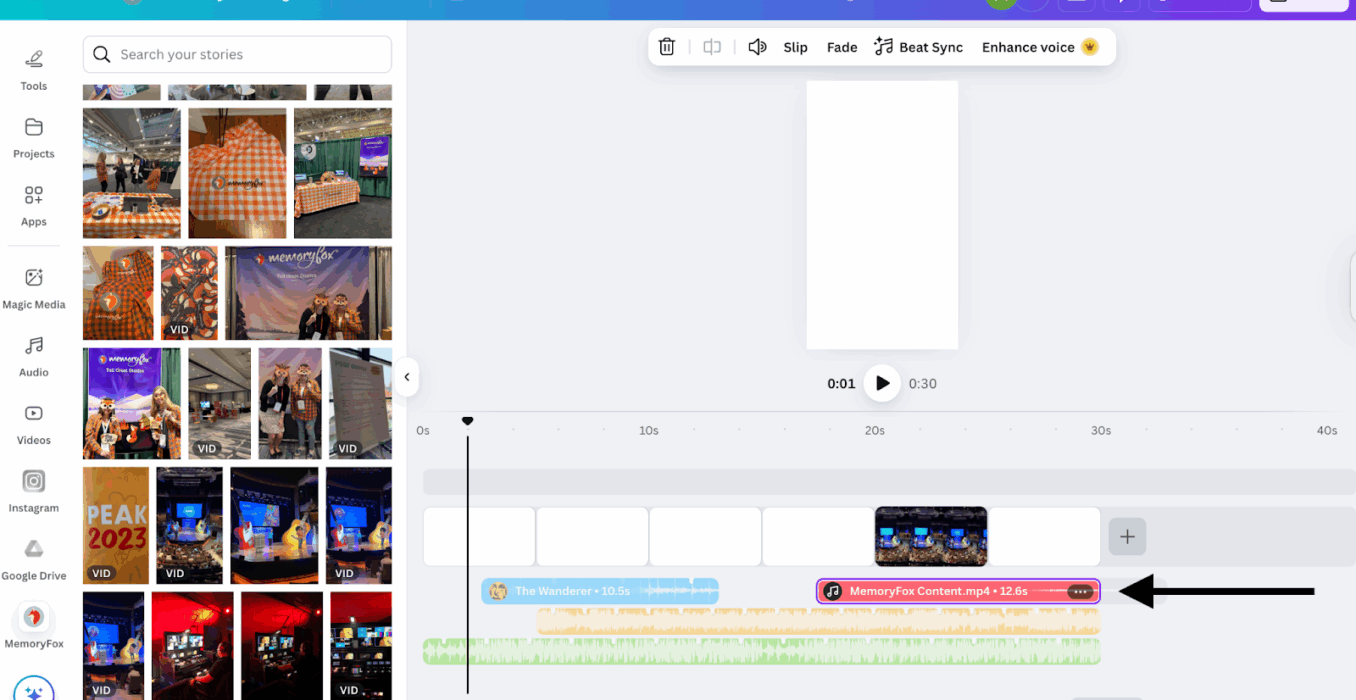
Step 4: Edit Audio
My favorite part of editing a video, what I believe ties everything together, is the sound. Sound and song overlays have a high impact on the algorithm; how often your video is displayed on a users screen, and its “viralability.”
Adding audio:
You can add audio (song, voice recording, etc.) by simply clicking on “add audio” underneath the page display or “elements” on the left side bar. This will not mute the rest of your videos, and you can have as many different sounds playing all at the same time. Each audio will appear as a bar underneath your video pages. You can lengthen or shorten your audio the same way you did the pages if you don’t want one song playing the entire time. Click on your audio bar to access audio editing tools such as volume control, fade, and split features, which will appear above the video display.
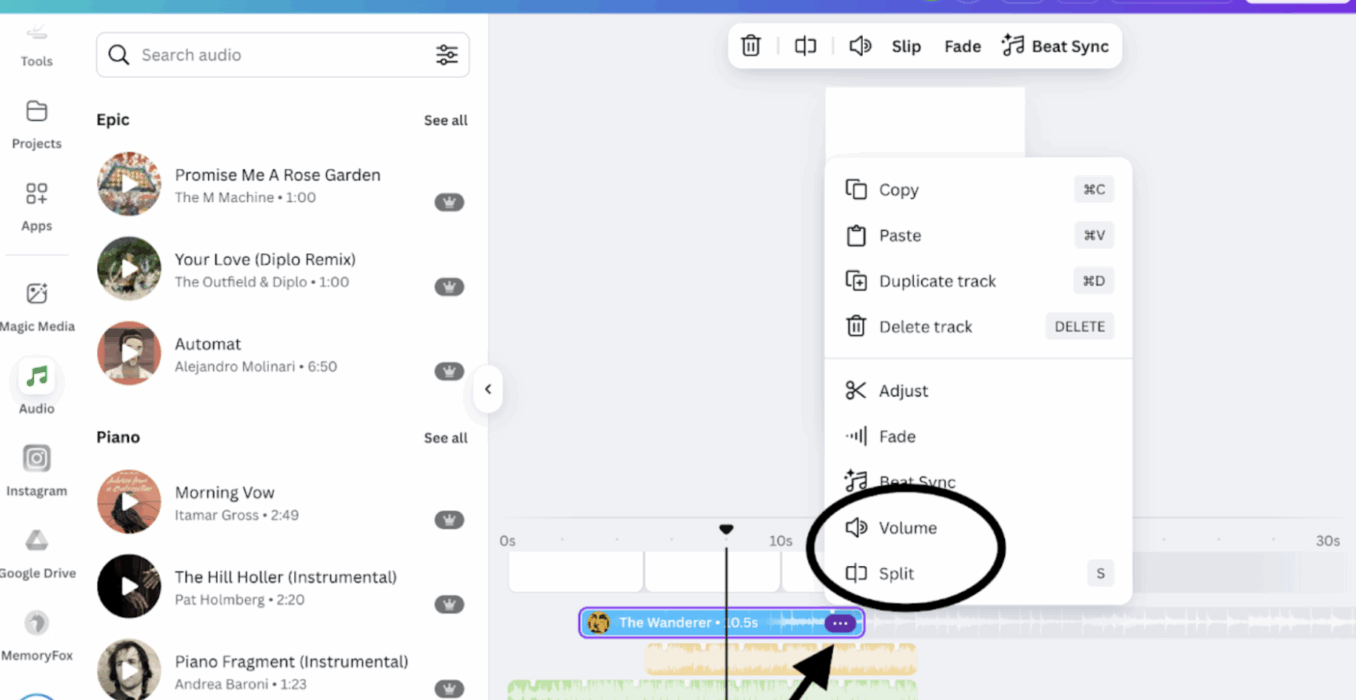
Splitting audio files allows you to change the volume in different parts of your video. This way, you can highlight the audio of your own uploaded videos or mute what may not need sound without silencing the entire thing.
Extracting Audio:
Oral storytelling is one of the most powerful tools a human being has. It sets us apart from other species and delivers powerful messages in a direct way. A picture is worth a thousand words, but artfully placed words can speak volumes. If you are using videos with sound you want to highlight, try extracting the audio and moving it to unexpected places in your montage to see how the feel of the video may change.
When you add your own video to Canva, the sound bar will appear above the page. As you adjust the length and placement of your video, the sound will stay attached, lengthening and traveling with the video. Be careful not to separate the audio from the video until your visuals are placed where you want them, or it will be more difficult to differentiate the sounds and may cause more confusion than necessary.
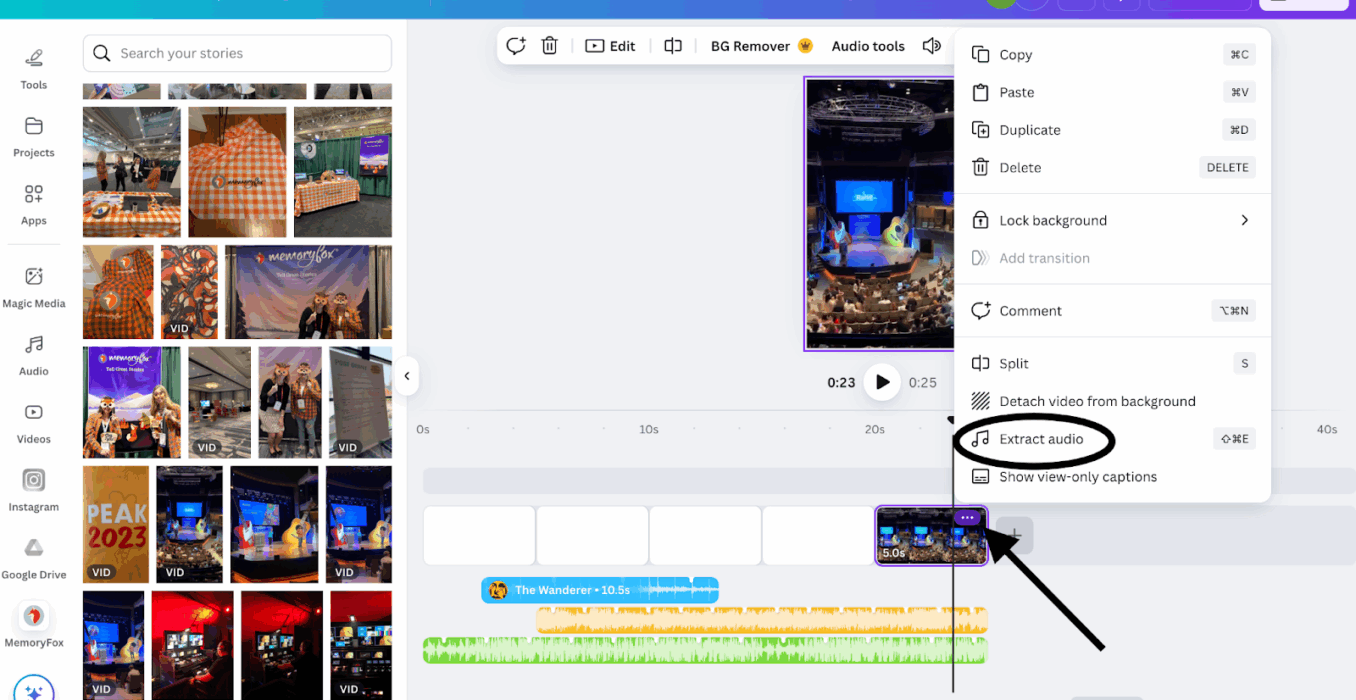
When you are ready to detach the audio from the video, click on the sound bar above the page, click “audio tools” in the bar above the video display, then click “extract.” Now the video audio will act the same as all other audio you may have added throughout the project. You can move it around, extend duration, raise or lower volume, and split your soundbite into as many pieces as you’d like.
The Finishing Touch – Adding Captions:
The last thing I typically add to my projects is captions or text boxes. This is perhaps the easiest step in the process; click “tools” on the left sidebar, then the purple “T” to make a text box appear in the center of the page.
Text boxes first appear very small, so you will probably have to adjust the size by hovering over the corners and dragging the edges of the box or changing the font with the tools in the bar above the video display. You can also copy and paste an entire text box from one page to another which will give you a shortcut in keeping a uniform font throughout the video.
That’s a Wrap!
Hopefully, by now you are an expert in video editing and one step closer to making that Oscar-worthy Short Film! When you are learning how to make a composite video in Canva, remember to be patient while familiarizing yourself with the tools as it can quickly get frustrating. It will get easier the more you practice. Every story you share will help boost your community and your organization. Your work matters and we are here to help you.
Check out this video I created:

About the Author
Abby Duffy
Marketing Intern, MemoryFox
Abby’s passion for storytelling, the ways a great story can connect people and inspire change, is what brought her to MemoryFox. As a Marketing Intern, she is most excited to learn from such a creative and driven team while bringing powerful community stories to life.

Tell Great Stories with MemoryFox
Bring your mission to life with powerful stories collected directly from your community.
Get Started