Studies show that half of social media users prefer video over other types of content.
In an era dominated by fleeting attention spans and scrolling feeds, nonprofits face a unique challenge: how to captivate and inspire their audience amidst the digital noise.
Enter Instagram Reels, the dynamic platform offering a succinct yet powerful canvas for storytelling. For nonprofit professionals seeking to engage both potential and current donors, harnessing the potential of video testimonials on Instagram Reels is not just an option; it’s a strategic imperative. In this article, we will dive into every single step you’ll need to take to harness the transformative power of Instagram Reels, using video stories collected in MemoryFox.
Video Story Collection With MemoryFox
Step 1: Craft a Compelling MemoryFox Campaign
Capturing authentic stories directly from your community promises to set your Instagram Reel above the rest. But, you need to have a clear understanding of the stories you’d like to collect. When creating your MemoryFox Campaign, take care to ensure the prompts, or Call-to-Actions, you provide have clear, targeted questions for your community to respond to.
For example, instead of an open-ended question like Can you share your story?, ask a prompt that will elicit an emotional, distinct answer like How did (our organization) help you overcome the challenges you were facing? Check out these storytelling interview questions to spark new prompt ideas.
Here are a few additional tips to craft a compelling MemoryFox Campaign:
- Instagram Reels should be filmed vertically (9:16 aspect ratio), not horizontal.
- Use the consent section to inform your community that you plan to post their responses publicly on social media. This may change what they are willing to share.
- Create a “custom code” that is related to your campaign so the link is easily recognizable to your community.
- If your campaign is associated with a specific program or special event, consider upgrading to multiple branding themes.
Step 2: Distribute Your Campaign
It’s time to distribute your campaign to the community members you wish to collect videos from. Potential groups to collect video testimonials from include: program participants, volunteers, board members, staff, and donors. Use the campaign QR code and custom link to share with your community.
We highly recommend using a multi-channel approach when distributing your campaign. For example, place a QR code on a flyer or postcard as well as add your custom link in a series of emails. Explore additional strategies to boost community engagement here.
Step 3: Stay Organized 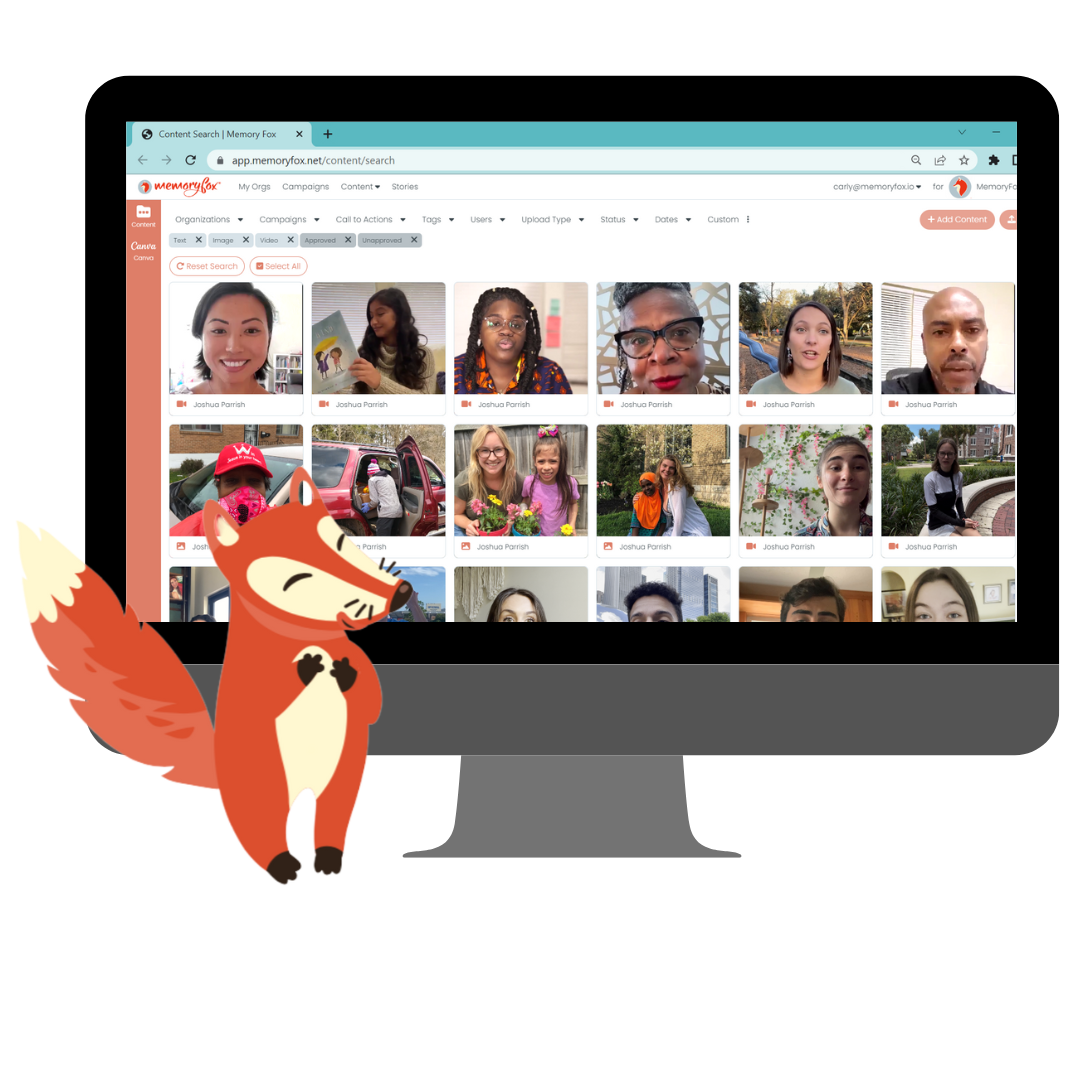
As video submissions begin to flood into your MemoryFox Story Bank, it’s important to remember that there are several ways you can stay organized. Story submissions will automatically be sorted with the newest on the top left and oldest at the bottom. But, you can also sort your stories by: campaign, call-to-actions, tags, users, upload type, status, date and custom tag. To make sure your entire team is on the same page, create a custom “Instagram Reels” tag to mark the videos you will post.
Step 4: Edit & Finalize Your Video
Use MemoryFox’s built-in video editor to make edits to your video. No need to download and learn complicated video editing software, or worry about those pesky social media watermarks that deprioritize your video when cross-posted. Combine, rotate, flip, trim, and crop your video without ever leaving the platform.
FOX TIP: Trim as much as possible from the beginning and end of your video. Make your video start the second the individual starts speaking so immediately draw in your audience.
Once you’ve finalized your video, click “download”.
How to Use Instagram Reels for Nonprofits
Step 1: Navigate To The Reels Section
To post an Instagram Reel, launch the Instagram app on your desktop or mobile and log in. On the Instagram homepage, tap the plus sign icon on the bottom left side on your screen, and select “REEL”.
Step 2: Edit Your Reel & Add On-Screen Captions
Once you choose your video from the camera roll, you have the freedom to explore and apply various editing tools like music, filters, effects and more.
Additionally, did you know that 85% of users watch Reels on mute? With this in mind, it is absolutely essential to add on-screen captions to your videos. Be sure to double check the auto-generated captions before you post, as it frequently makes mistakes with proper nouns or words with similar sounds.
Fox Tip: Use trending sounds and music! This is a key feature for your Reels because adding music, especially music that has been frequently used (AKA “trending”) automatically boosts your video to be shown on more individual’s feeds. Consider using a popular song to increase views and reach.
Step 3: Add Text Caption & Hashtags
Once your Reel has been edited, write a caption that corresponds to the video, add a location, and add trending hashtags to increase the likelihood of people seeing your content. Tag any other users to your post if needed.
 Fox Tip: Make sure to include specific hashtags that pertain to your video like the name of the organization, the setting on the fundraiser, the state this is located in and more!
For example, if your video has nonprofit fundraising tips, then your hashtags can look like this: #FundraisingIdeas #FundraiserIdea #RaiseMoney. You can also add trending hashtags like: #Explore and #ExplorePage.
Step 4: Edit Your Profile Display
Instagram allows you to adjust your profile display when posting a Reel. Choose whether you’d like to share it to your “Main grid and Reels grid” or “Reels grid only” by tapping “Profile Display”. You can also select if you want your reel to be public or shared to specific groups/friends only by selecting “Audience”.
Step 5: Share Your Reel
You are ready to post your Reel! To publish your video, tap “Share” on the bottom right. Be sure to keep the app open while your video uploads to 100%.
Step 6: Post To Your Instagram Story
After posting your Reel, you should post it on your Instagram Story for viewers to see in case they miss it on their feed. This will help with boosting engagement, which will make your Reel more likely to find new viewers. Don’t forget to respond to comments to engage with your audience!
As the digital landscape continues to evolve, nonprofits must adapt and innovate to effectively convey their impact through video storytelling. Instagram Reels for nonprofits presents an opportunity to break through the clutter, humanize their cause, and forge authentic connections with potential donors. By harnessing the emotive power of video testimonials, nonprofits can cultivate a vibrant community of supporters. So, let your nonprofit videos take flight from your MemoryFox Story Bank to Instagram Reels, and witness firsthand the profound impact they can have in advancing your organization’s mission.
